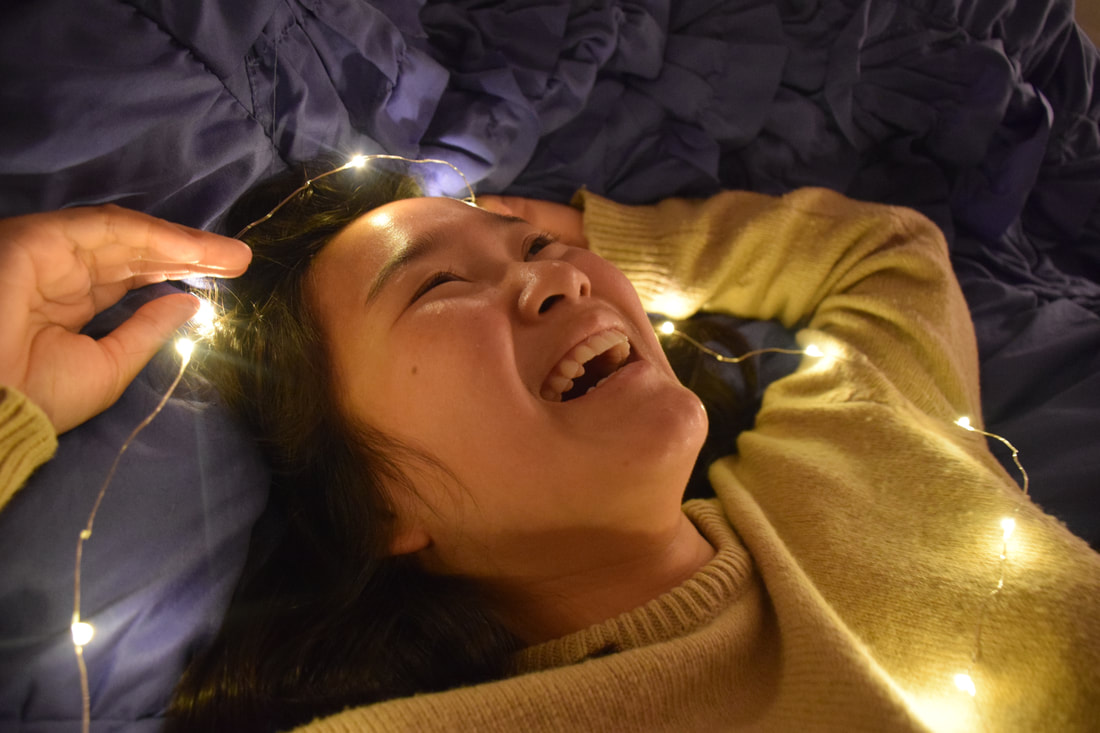
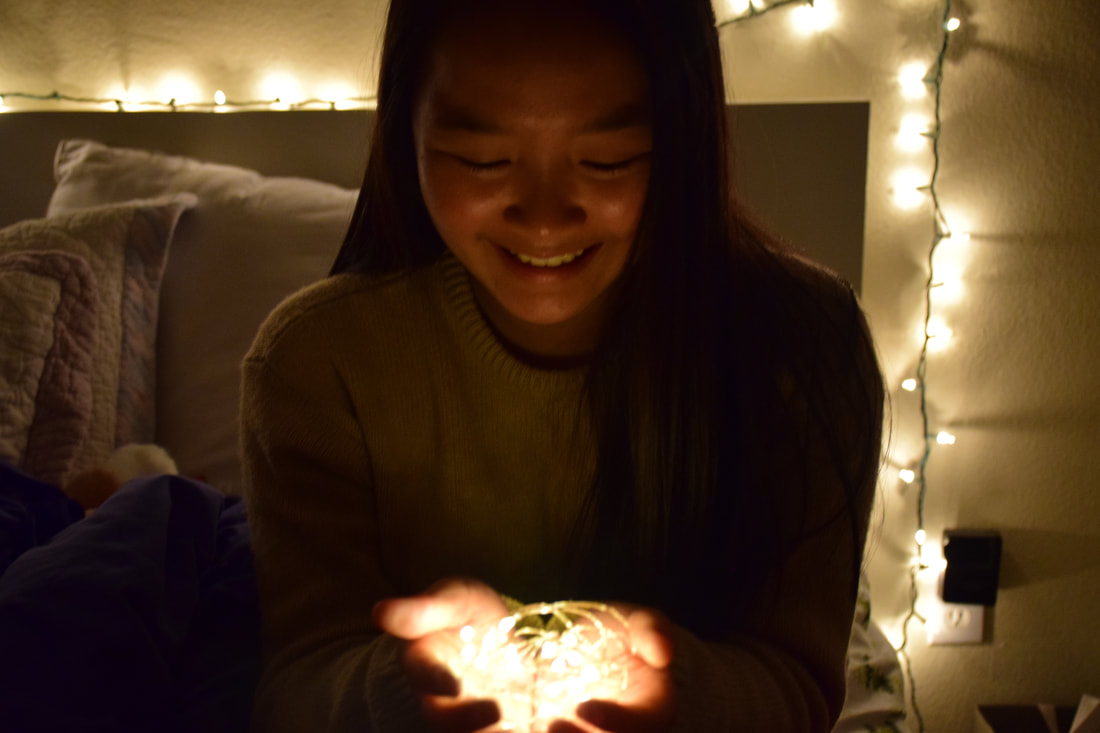
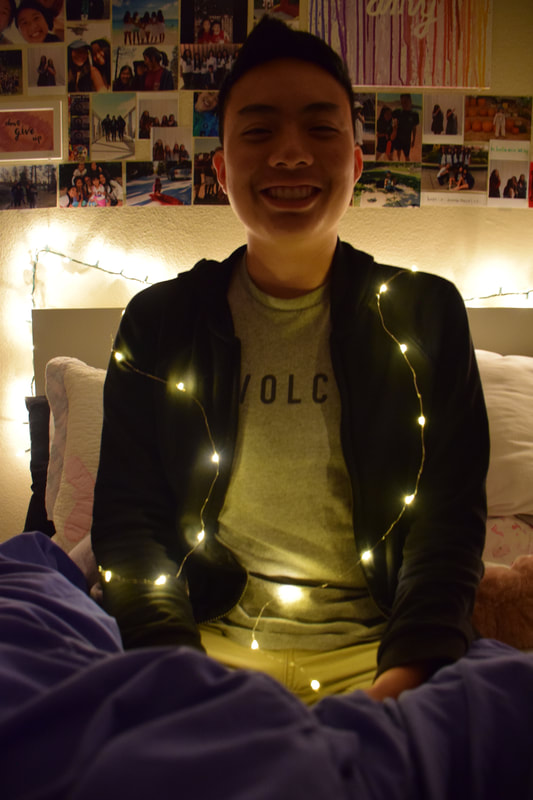
 ProgressMore fairy lights! Amy is always such a happy bean, and I'm grateful to have been able to spend time with her. The middle photo was the hardest to take. The photos taken similarly were all grainy because her face had the least light exposure in them. I used the "no flash" feature; flash would've taken away the appeal of using fairy lights. The most difficult, similar to the previous shoot, was finding a way to improve the quality of the photo (as most of it was taken in dim light) using the fairy lights. Most of the focus was the fairy lights and how they brightened the subject, rather than the actual setting the camera was on. Changing the settings didn't necessarily lead to an improvement in the photo quality, satisfactory photos resulted when the fairy lights were altered continuously throughout the shoot. For the two pictures on the side, for example, I had asked Amy to lie down and have the fairy lights frame her face ( in order to expose her face to more light). Similarly to how Ben's had turned out, the photos with more light exposure on Amy's face were of higher, less grainy, quality. ReflectionFairy lights were, by far, the hardest to work with (they were also the most fun, and , when used right, produced really quality photos). It was, in a way, really strenuous. I usually relied heavily on the camera settings, and made the mistake of religiously depending the camera features for the quality of the photos. The experience of working with lights and having to manually adjust and try out different poses and positions required me to depend on my actions, rather than the camera's features. I am very happy with the way they photos turned out, and will probably be experimenting with fairly lights more often in the future; despite being difficult, they were really fun to work with.
0 Comments
 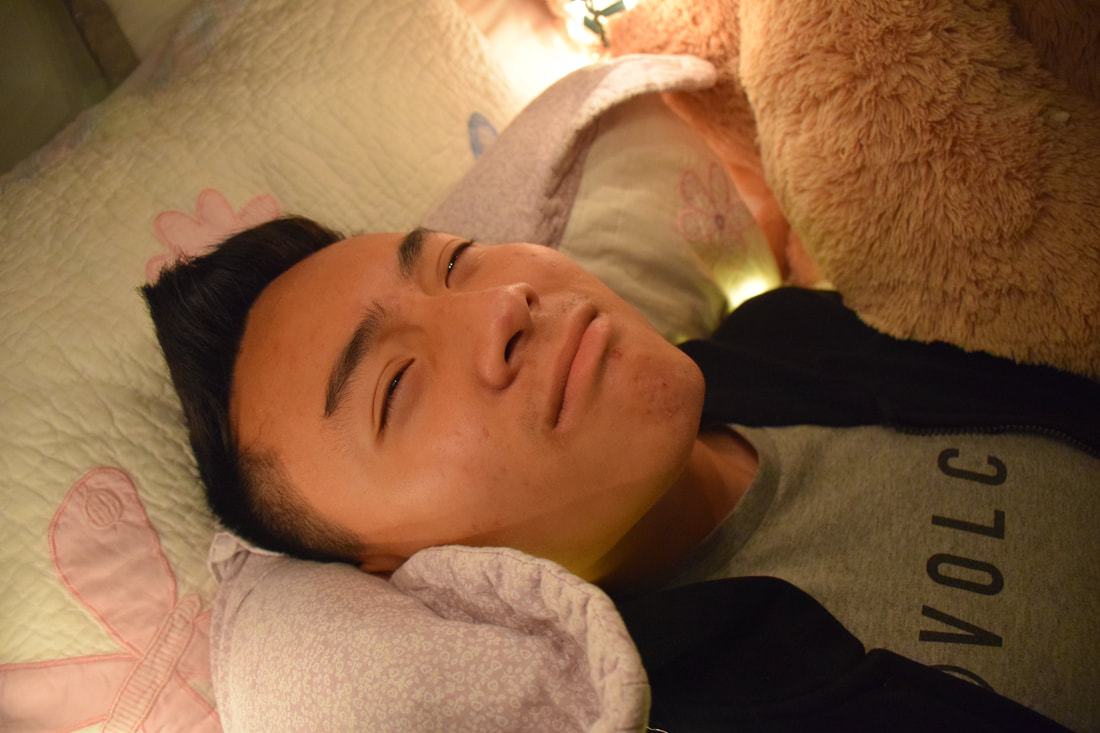  ProgressWe brought out the fairy lights this time! Thank you Ben for smiling, despite having to pose so much in such odd fixed positions. This is the first time I've truly had to maneuver the light in order to better accommodate the subject. Fairy lights are by far the hardest to work with. Based on pictures online of photography with fairy lights, they all turned out fairly clear. However, because all the lights were turned off, in order to truly use the fairly lights as the only source of lighting, the photos in which the subject was in the dark with only fairly lights strewn around the body (i.e. the last photo) turned out grainy and blurred, which was frustrating. I figured half way through that if I wanted higher quality, less grainy photos, I'd have to re-adjust the lights to illuminate his face more, thus taking out the "graininess" evident in the previous photos. The first two are admittedly more satisfactory, because the quality is clearer (due to exposure to more light). I also really enjoyed working with the warm tones the lights were able to provide when brought closer to his face. I was holding them up as I took the pictures, so it wasn't just the small lights strewn across, but also the bigger fairy lights seen in the last photo that was used to illuminate his face. ReflectionThis definitely reflected more upon my ability to use the objects around me, rather than simply the camera settings, to capture the pictures. I focused less on what setting the camera was fixed on (no-flash), and more on how to use the fairy lights to adjust the lighting and quality. This is especially important, as I felt my control over the lighting was lacking in the previous shoot. Working with fairy lights in the dark also requires one to constantly think of new ways to use the lights. I couldn't stay fixed to the poses I wanted Ben to be in at the beginning (as illustrated in the last picture). I had to find different ways to get to the kind of pictures I wanted to capture. While it was frustrating having to work with just the fairy lights, I came to accept that it was okay to not know what kind of pictures I had in mind before the shoot. It was a lot of improvisation and adaptation to the scene throughout the shoot, which frightened me at first, because it took a while before I found a picture I was satisfied with, but it surprisingly turned out alright in the end; I'm happy with how the photos had turned out.
ProgressDo nOT Be foOLed bY the FaKe sHrUbBerY; my friend, Amy, was kind enough to model for the sake of the blog (thank you so much Amy, you're truly an angel). Because the ultimate requirement for this quarter is to take pictures indoors, I settled with the lighting she already had in her room. We took the fake leaf decorations left behind in her house to add more colour and hopefully creativity to the pictures. This time around, I'm more familiar with the settings, so I can rule out which ones I shouldn't be, or I prefer not to use. Admittedly, working indoors was a lot more difficult than working outdoors. I tested a lot of different settings before simply settling on "no flash". Typically, for indoor close ups, I settled on "close up" or "portrait", both of which came with flash. I wasn't adamant to using flash, but the result was an overexposure of her face, casting away the shadows needed to add more depth and dimension to the photo. So, with these particular photos, shadows were factors that were especially highlighted (especially since the props were set up to frame both sides of her face). ReflectionIt is definitely more comfortable working outdoors. The "photoshoot" was set up in her room, where no natural light could've possibly seeped in; we were entirely dependent on the light she already had in her room. However, because shooting indoors took away the features that I favoured most, such as "scenery" or "close up", I was forced to look for other things to capture. Thankfully, Amy had a variety of poses to try for the shoot, so while finding the correct feature was a feat, her facial expressions and poses in each add colour and life to the photos regardless of the technical quality.
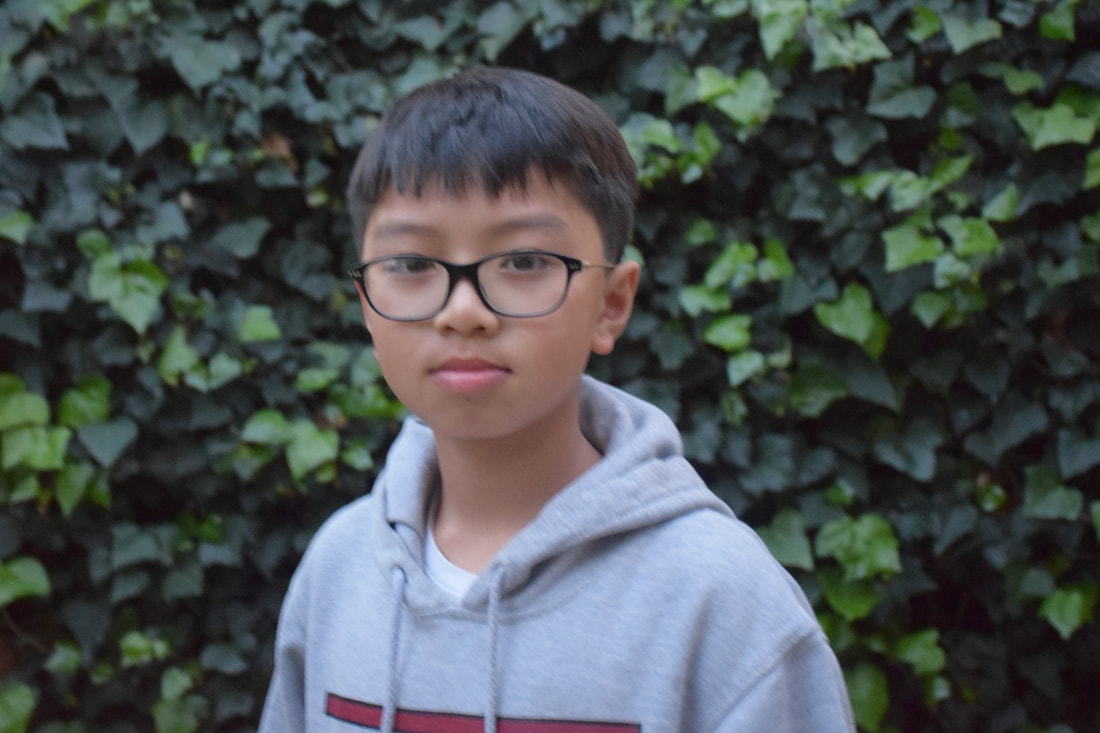
  ProgressThis one was taken at around 5:30 to 6:00 as well, but is noticeably "brighter" than the 3 previous shoots. The location was actually in the front, rather than backyard (which would explain why the subjects had more exposure to sunlight). With this in mind, I experimented with the lighting and actually tried to make the photos darker. The settled upon feature was "landscape" as much of the background involved shrubbery or flowers of some sort. The subjects' faces were clear and brightened by the remaining day light. ReflectionI had a harder time with brighter lighting, actually. It was more frustrating because 3rd quarter's theme was supposed to highlight the darker tones. While I appreciated the light, it wasn't the aesthetic I had been going for when I resolved to experiment with darker natural light. I should've waited a little longer to shoot, or gone in the back where the light isn't so hard-hitting.
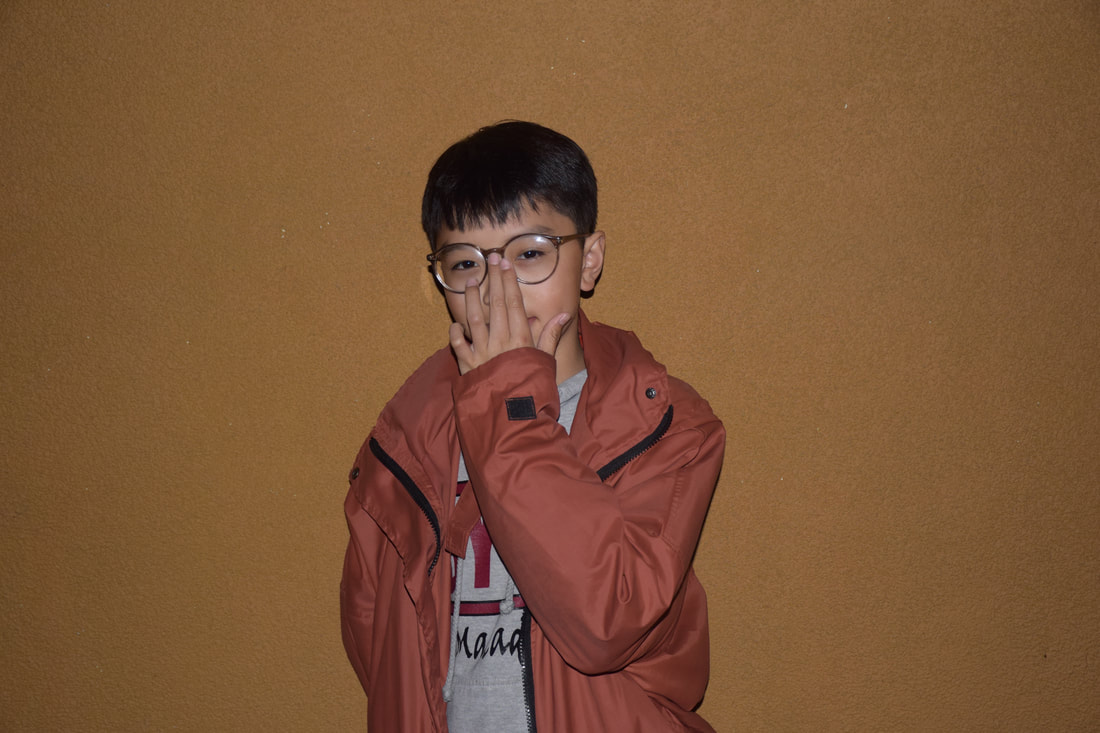
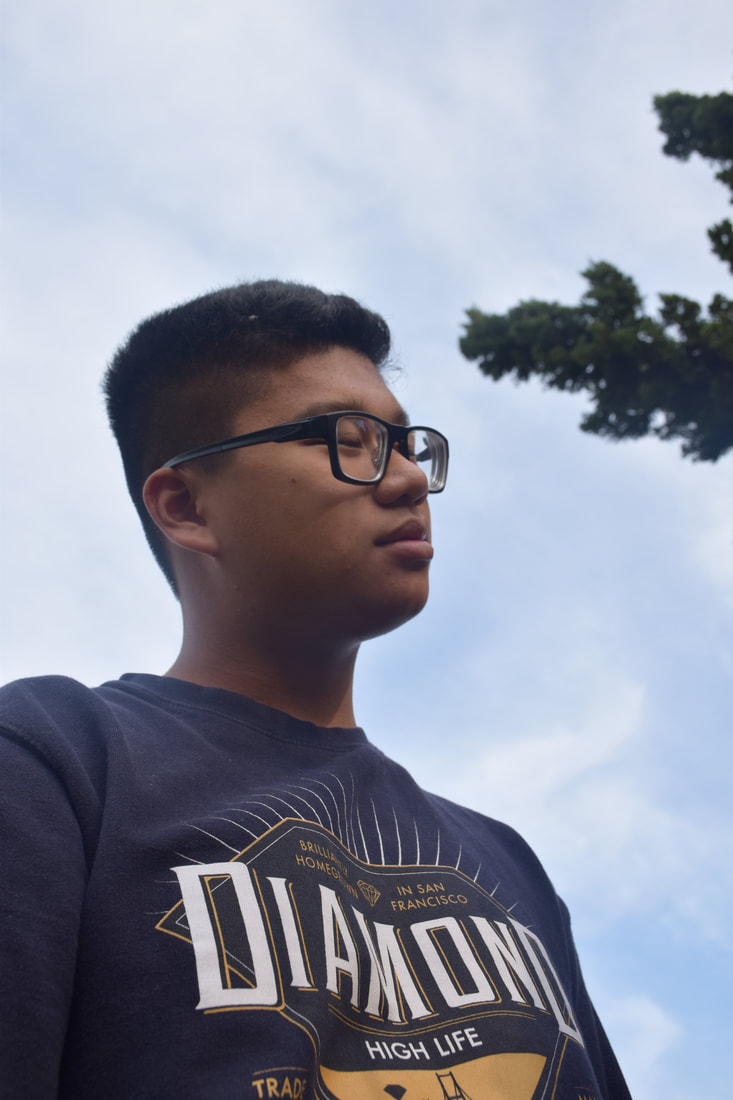
ProgressFor the third photo shoot in low light, I caved and used the FLASH (hi my name's Barry Allen and I'm the fastest man alive). I used the same feature as last time "close up", but because I wasn't too happy with how dark the pictures were turning out to be, I decided to try experimenting with flash. The orange wall in the back of Aidan complimented the colour of his jacket. The biggest challenge was to step as far away as possible so that the flash isn't blinding reflected in the glare of his glasses. ReflectionThe significance of the photoshoot was the need to use flash photography. I had promised to myself at the beginning of the blog project not to use flash no matter what the lighting was (it didn't fit the aesthetics I was going for), but alas, the promise is broken. I had initially thought that using flash would just take away from the subject and detract the beauty in appreciating natural light. I still retain this mindset (I am not good enough to work well in any light with flash), but by setting a solid colour background I found the resulting image to be alright (the flash did the pictures well, much more so than the pictures without flash). To conclude, if there is ever a time to use flash, I shall be taking it out only with a simple, solid coloured screen.
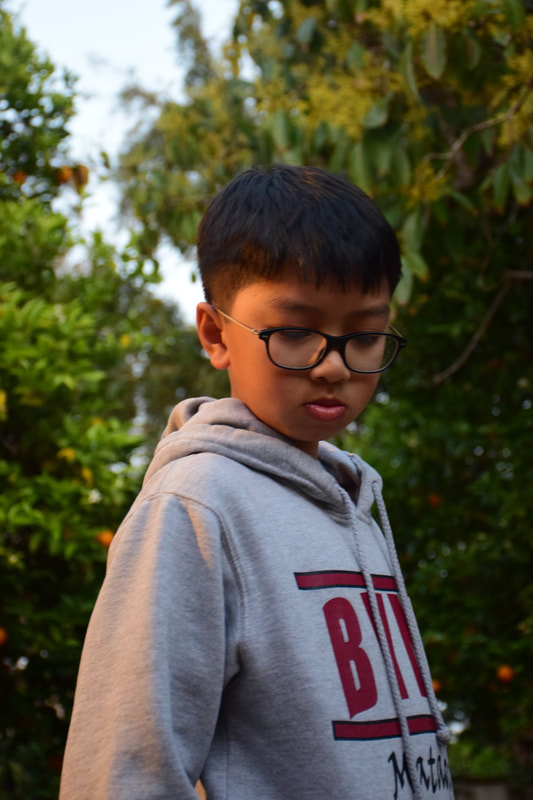
ProgressThe second time with low light! This time, the weather was admittedly a little warmer than it was in the previous shoot. Once again, we started at around 5:30 to 6:00, but instead of scene, I used the "close up" feature without the inclusion of flash. The photos turned out warmer, and the day light left over gave it a warmer tone, a contrast to the blue hue noticeable in the last photoshoot. Frequent poses that I find myself referencing revolve around lower or head on (levelled) angles. I also see a frequency in using both horizontal and vertical frames (though this shoot was more vertical) regardless of the background. ReflectionThe warmer tones illustrated in the second photoshoot with low light was also quite enjoyable, both cool and warm tones emit different feelings regarding the pictures. I feel as though the cool tones from the previous shoot did a better job at emphasising the shrubbery behind the subject and putting the main focus on the subject. The warm tones and the colours from the second also enhanced the background. While both had similar scenery, I felt as though the warm colours did not highlight the untouched and "un-enhanced" beauty of nature and natural light depicted in the first shoot.
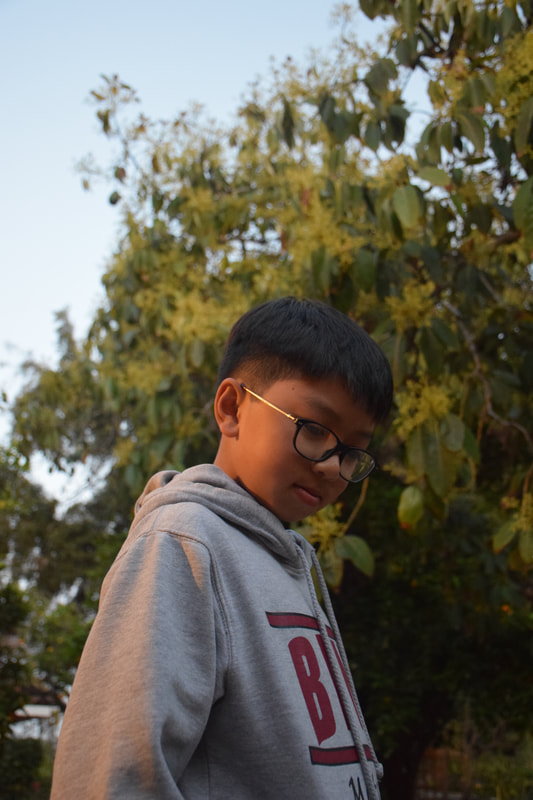
ProgressThe ultimate goal for quarter 3 was to start shooting in darker natural light. Instead of going out mid day to take pictures, I decided to begin at around 5:30 to 6:00 (this can be said for all blog posts pertaining to quarter 3). To shoot, I decided on no flash while still using the "landscape" feature on the camera. It gave the picture a bluish tone and accentuated the cooler colours of the subject and the background. Another essential (though quite obvious) key to remember when shooting is to keep a steady hand, as to make sure the camera doesn't shake and blur the processed image. The pictures above, especially, frustrated me because the subject came out not as clear as I had hoped. While the cool tones were definitely a feature that I planned on capturing in further shoots, I was unsure as to why the subject came out blurred (as I had fixed the vibrations in my hand after the first picture). ReflectionOverall, the first experience with low light was a lot less nerve wrecking than I thought it'd be. I find myself generally straying away from low light simply because it scared me (having to adjust to make sure the subject turned out alright). Light in the afternoon to early evening is always ideal (as it's never too bright or too dark but a good in between stage), so testing out pictures in low light had my expectations extremely low. However, I really liked the cooler tone of the pictures, and look forward to further experimentation.
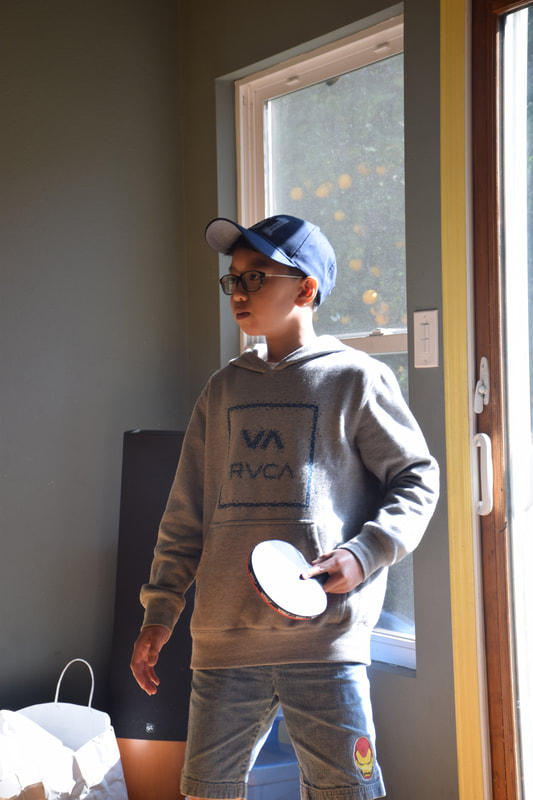
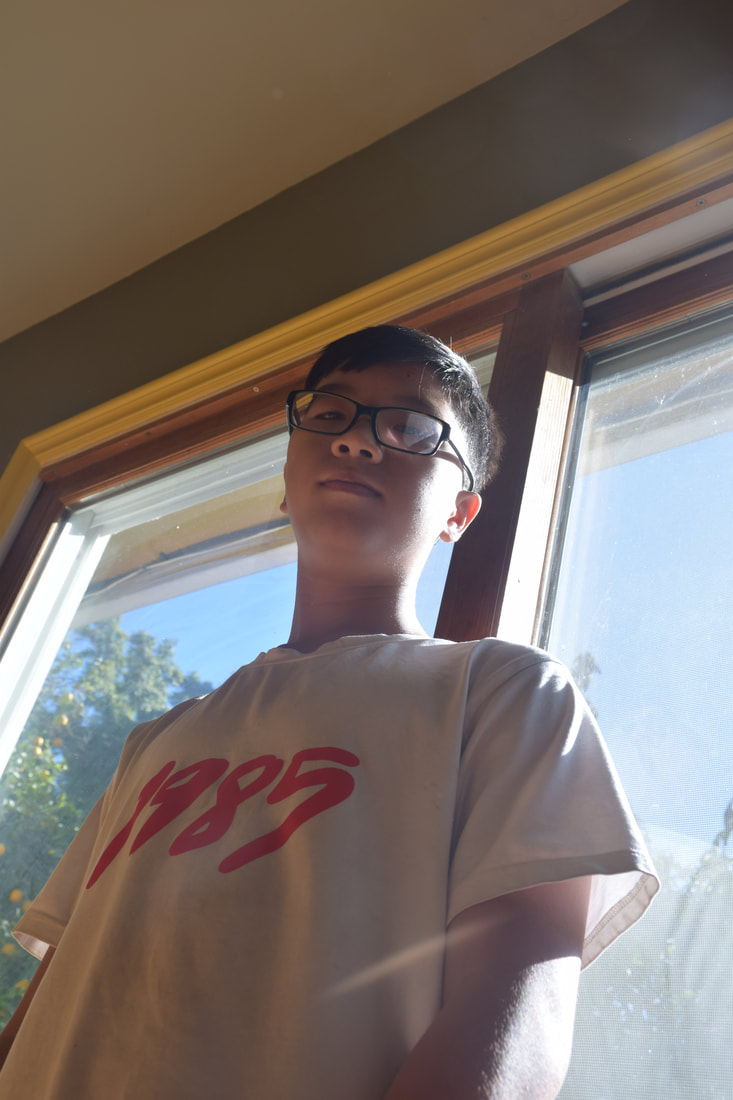
ProgressMore vertical angles! Because it was taken in the early morning to afternoon, lighting was close to ideal. Only thing adjusted was camera speed, which was relatively high to capture more in less time (takes a shorter time to capture each photo). Aperture was left as is (F6.3). Purposely taken near the window/ source of light, and subjects are not directly facing the light (to prevent over exposure). Vertical angles again! Because subjects are standing, and background doesn't need to be prioritised, turning the camera allowed for most of the movement to be captured. The angles were favourable visually to the main subjects (elongated proportions), and also really fun to try out. ReflectionIt was really fun to capture them in their most relaxed and hyper active state. I was lucky enough to take photos of Aidan in between or just before movement, so the pictures didn't blur. Ethan's was more stationary, but it was the first picture taken from a lower angle, with the subject looking slightly down at the camera. At first, there was worry about the angle being unflattering, but it turned out alright :). Favourite aspects of this shoot: camera angles, natural lighting, and subjects' movement/poses.
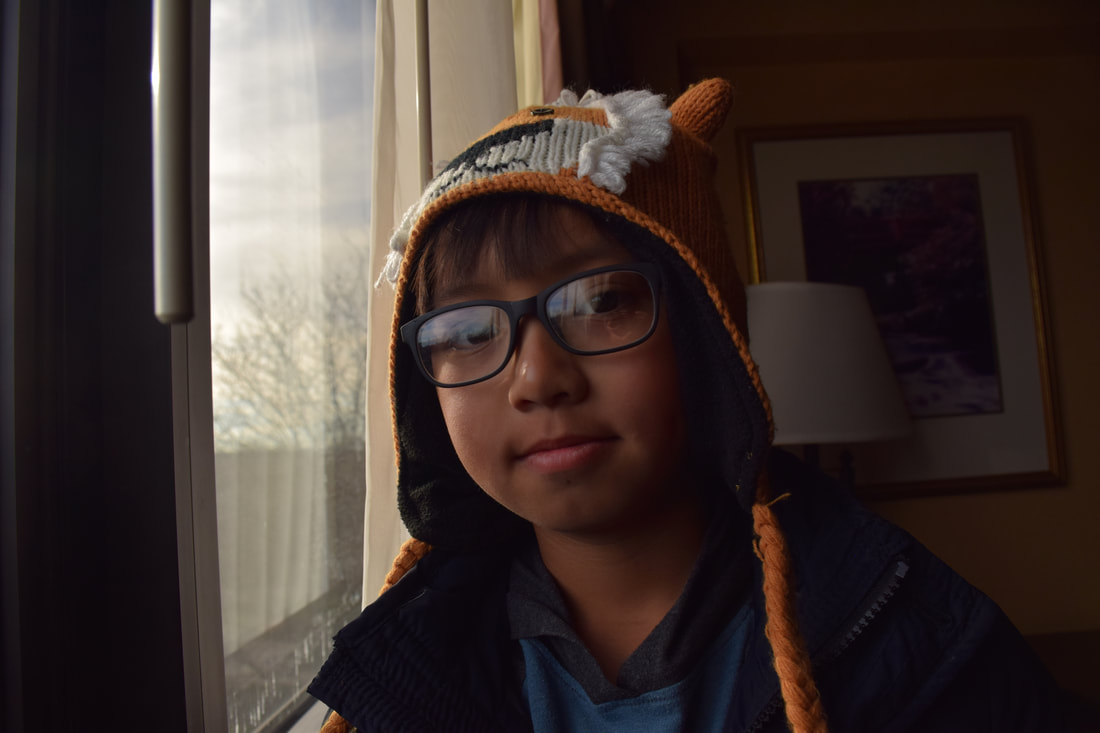
Ethan and Aidan in beanies. Thank you guys for posing :). ProgressNatural light from the window casted shadows across the left sides of their faces and gave more detail and definition to facial features. Camera shutter speed set to 1/6 (1/60 of a second), and aperture set relatively high (around f/8) to allow more light to pass through. It was difficult to find the right lighting, as it was already close to evening and natural light wasn't bright enough to skip adjustments. ReflectionThe colours are very warm and give off an overall "cozy" feel to the photos. Though the light isn't as bright as the other prior photos, I like the shadows and how it stresses the 3-dimensional features of their faces. Close up feature on the camera allowed the subjects to be front and centre, and detraction from the background wasn't a problem (background wasn't the main focus).
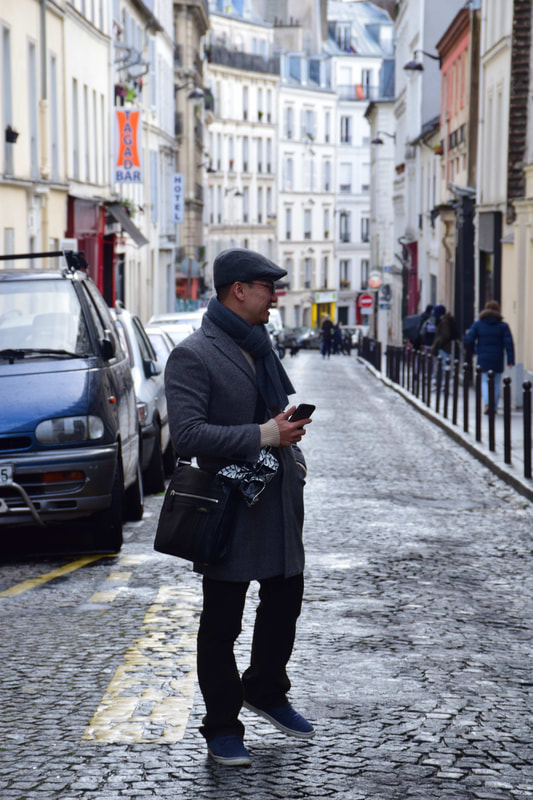
ReflectionRather than a compilation of 2 or 3 photos, the 4th blog is just a single picture. Admittedly, this was the one I wanted to include because it was the only one taken vertically. The subject looks taller, and the angle also captures how narrow the streets are. For close ups, turning the camera vertically would mean a significant cut off of most of the background, as the intended subject would take up almost all of the frame from top to bottom. However for photos that don't require any particular zoom ins, I find the vertical to be the most appealing, as it highlights both the subject and the background.
(Medieval Town, Tuscany) It was freezing, and Aidan wasn't too happy with the weather, but here are some rare shots of him smiling. ProgressLuckily the lighting was clear enough to fully highlight background and closeup features. Adjustments weren't needed, I set the camera to close up mode and stayed with it throughout the day. Aperture was average (the lighting was mediocre and wasn't extremely light or dark), and fast shutter speeds are more preferable (easier to take stable pictures). I feel as though low shutter speed and the "close up" feature will remain consistent throughout most of the daytime photos. Reflection First blog with a person! Thankfully, it wasn't too difficult, the weather was very kind and the subject was surprising compliant to requests to smile more (thank you Aidan, please keep smiling). I'm actually really happy with the way these turned out. His face and the background is clear, and though there isn't anything about this that particularly stands out, he smiled! After days of grumbling because the weather was "just unacceptable" (Aidan), he managed to pull through.
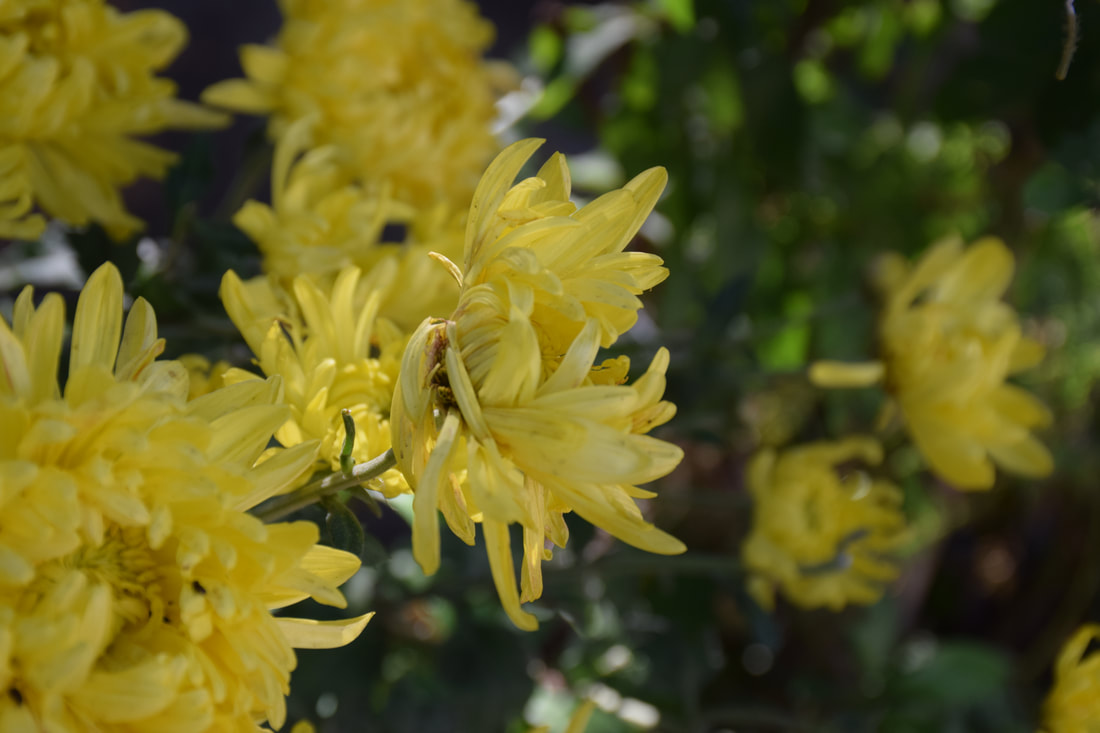
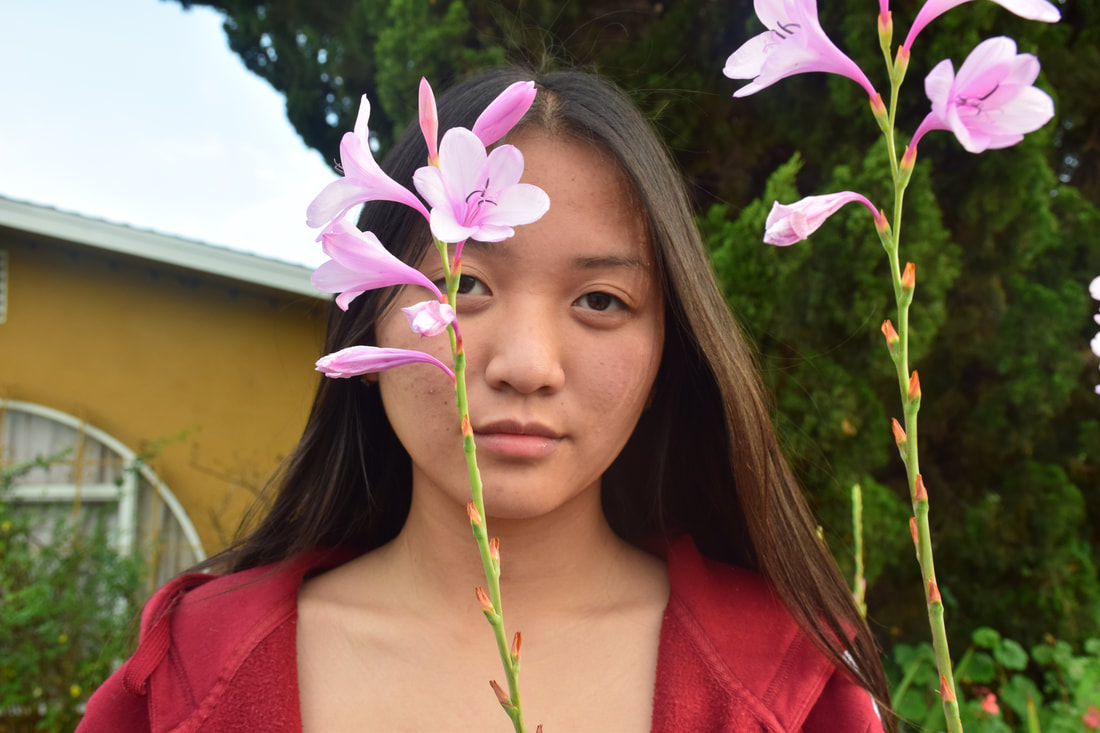
ProgressKnowing that for most of the pictures of flowers or other (just as great because don't discriminate) plants I would be using the "close-up" feature, I stuck with it for the majority of the "shoot". Most of the other additions would've been flash or no flash. The lighting during this was darker than the ones prior, which made it a little harder to "hype up" the plants, but it turned out alright in the end. The medium to low lighting gave the photos a more toned down vibe, but I really like it. Seeing the lighting darken, I was compelled to use flash more, but after test shots, decided that it didn't emphasise the natural aspect I was going for. ReflectionThe "shoot" was in the front yard and was done at a later time of day, hence the different lighting. Because the light wasn't as "hard-hitting" as it was in the other shoots, the images appear "cooler" in tone and the colors aren't as saturated. I believe that this is the extent of dark lighting before my photos become "awkward" because I don't work well with really low light. This concludes the end of the "static object" portion, on to candids :).
  ProgressI'm shooting with the Nikon D5300 with 18-140mm lens. For the moment, I think I'll stick with the same lens because they're really nice and I enjoy taking photos with them. Having not taken pictures in a while, I decided to start with static objects, because it allowed me to prioritise experimenting with the basic functions of the camera first. To get a feel for how comfortable I am, to start, I took a few test shots without the prior knowledge of each function and held off on consulting friends. I found that the pictures I took tended to follow the same pattern, in that there was always one particularly focused on object amongst a mass of several. If there was a field of flowers, I'd pick one to focus on, preferably in the middle, and purposely blur out the objects in front and behind. ReflectionI ended up just clicking and focusing on objects I believed were the most aesthetically pleasing (subjective). While this method of taking photos produced desired results, I realised (at some point) that it wouldn't guarantee an improvement in photography because it's what I've always been doing. Another revelation was that I didn't actually take into consideration any of the functions; it was, at most, a continuation of focusing and clicking. For personal preferences, I do prefer natural lighting (because I feel safer when God is controlling the light), which I'll stick with for the moment. I'll begin consultation after this, and hopefully be able to incorporate a variety of different camera features in the next blog :).
|